I have forgotten my password
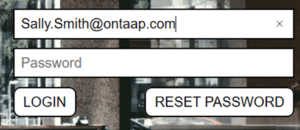
I have reset my password but still unable to login
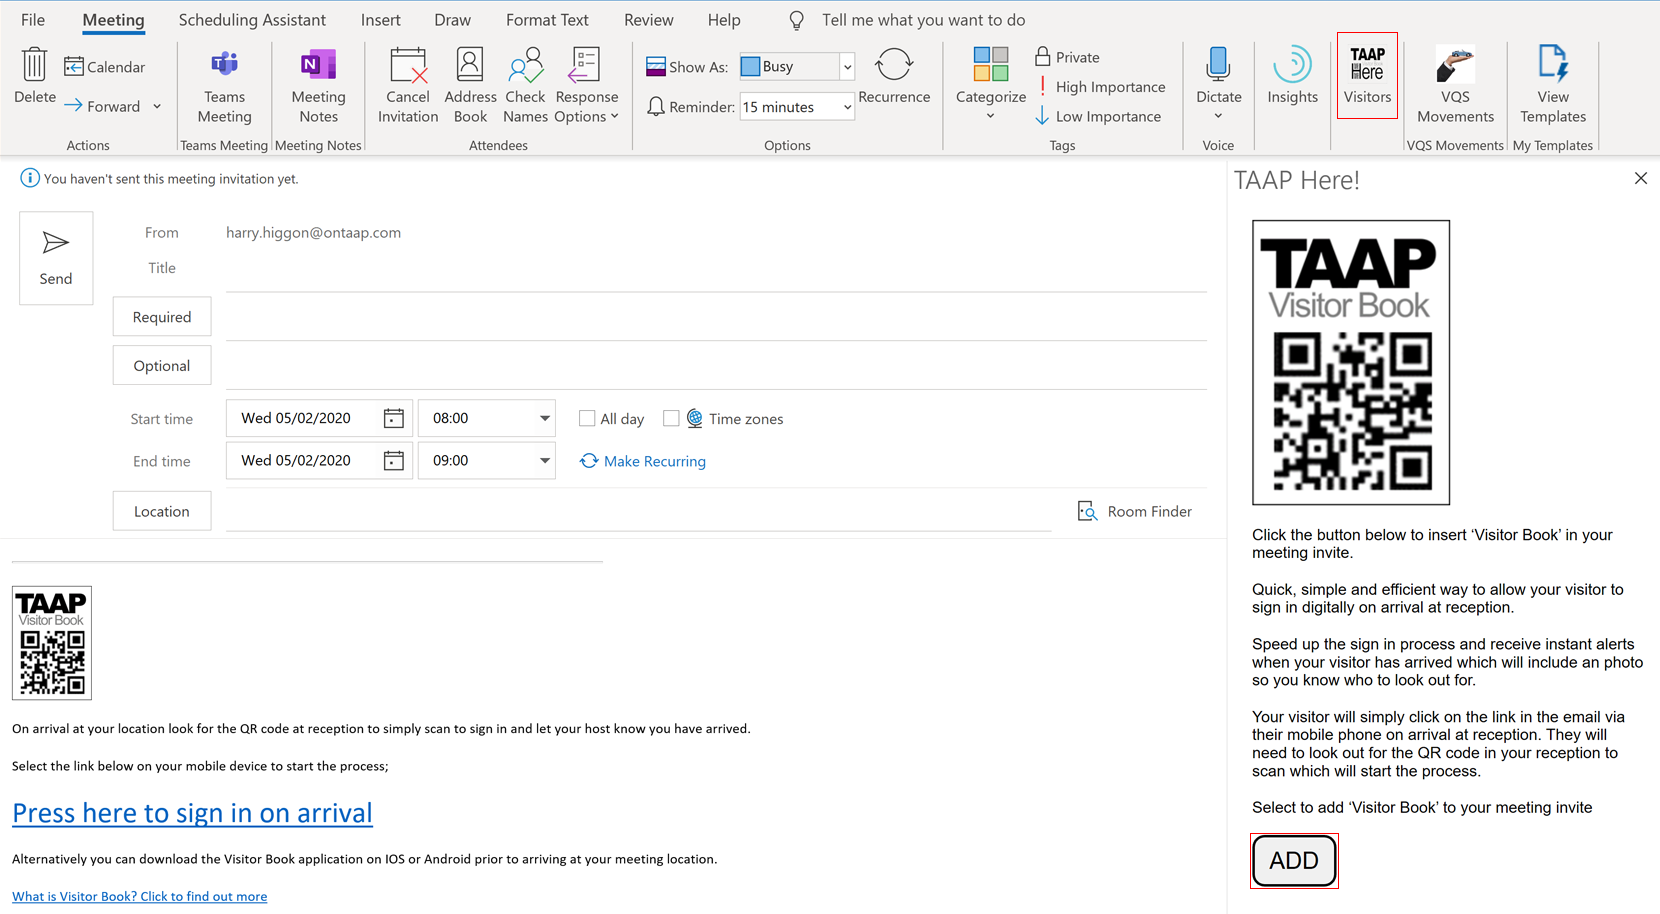
How do I setup the Add-In to be able to add the Visitor Book link to my email calendar invites?
How do I send an invite out with a TAAP Visitor Book Link?
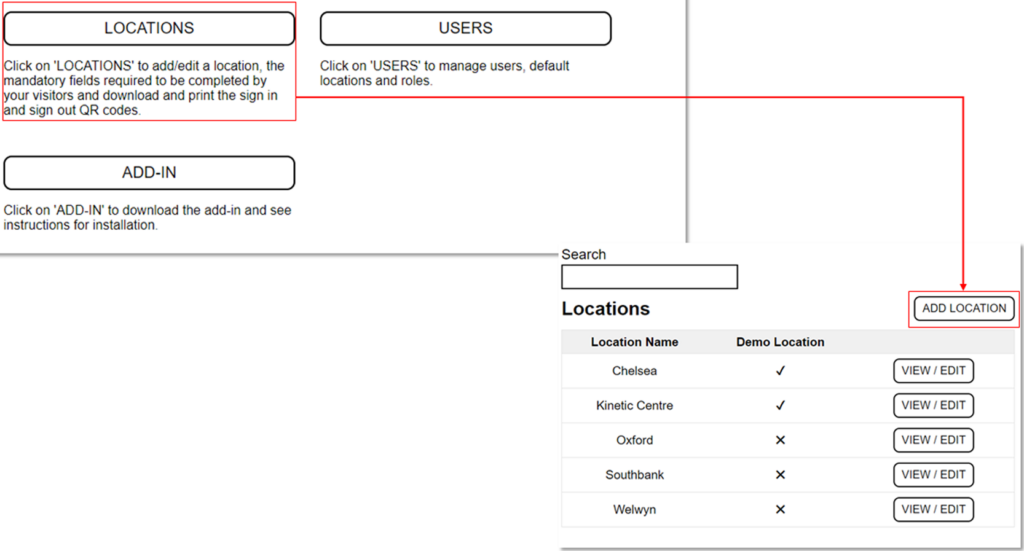
How do I add locations?
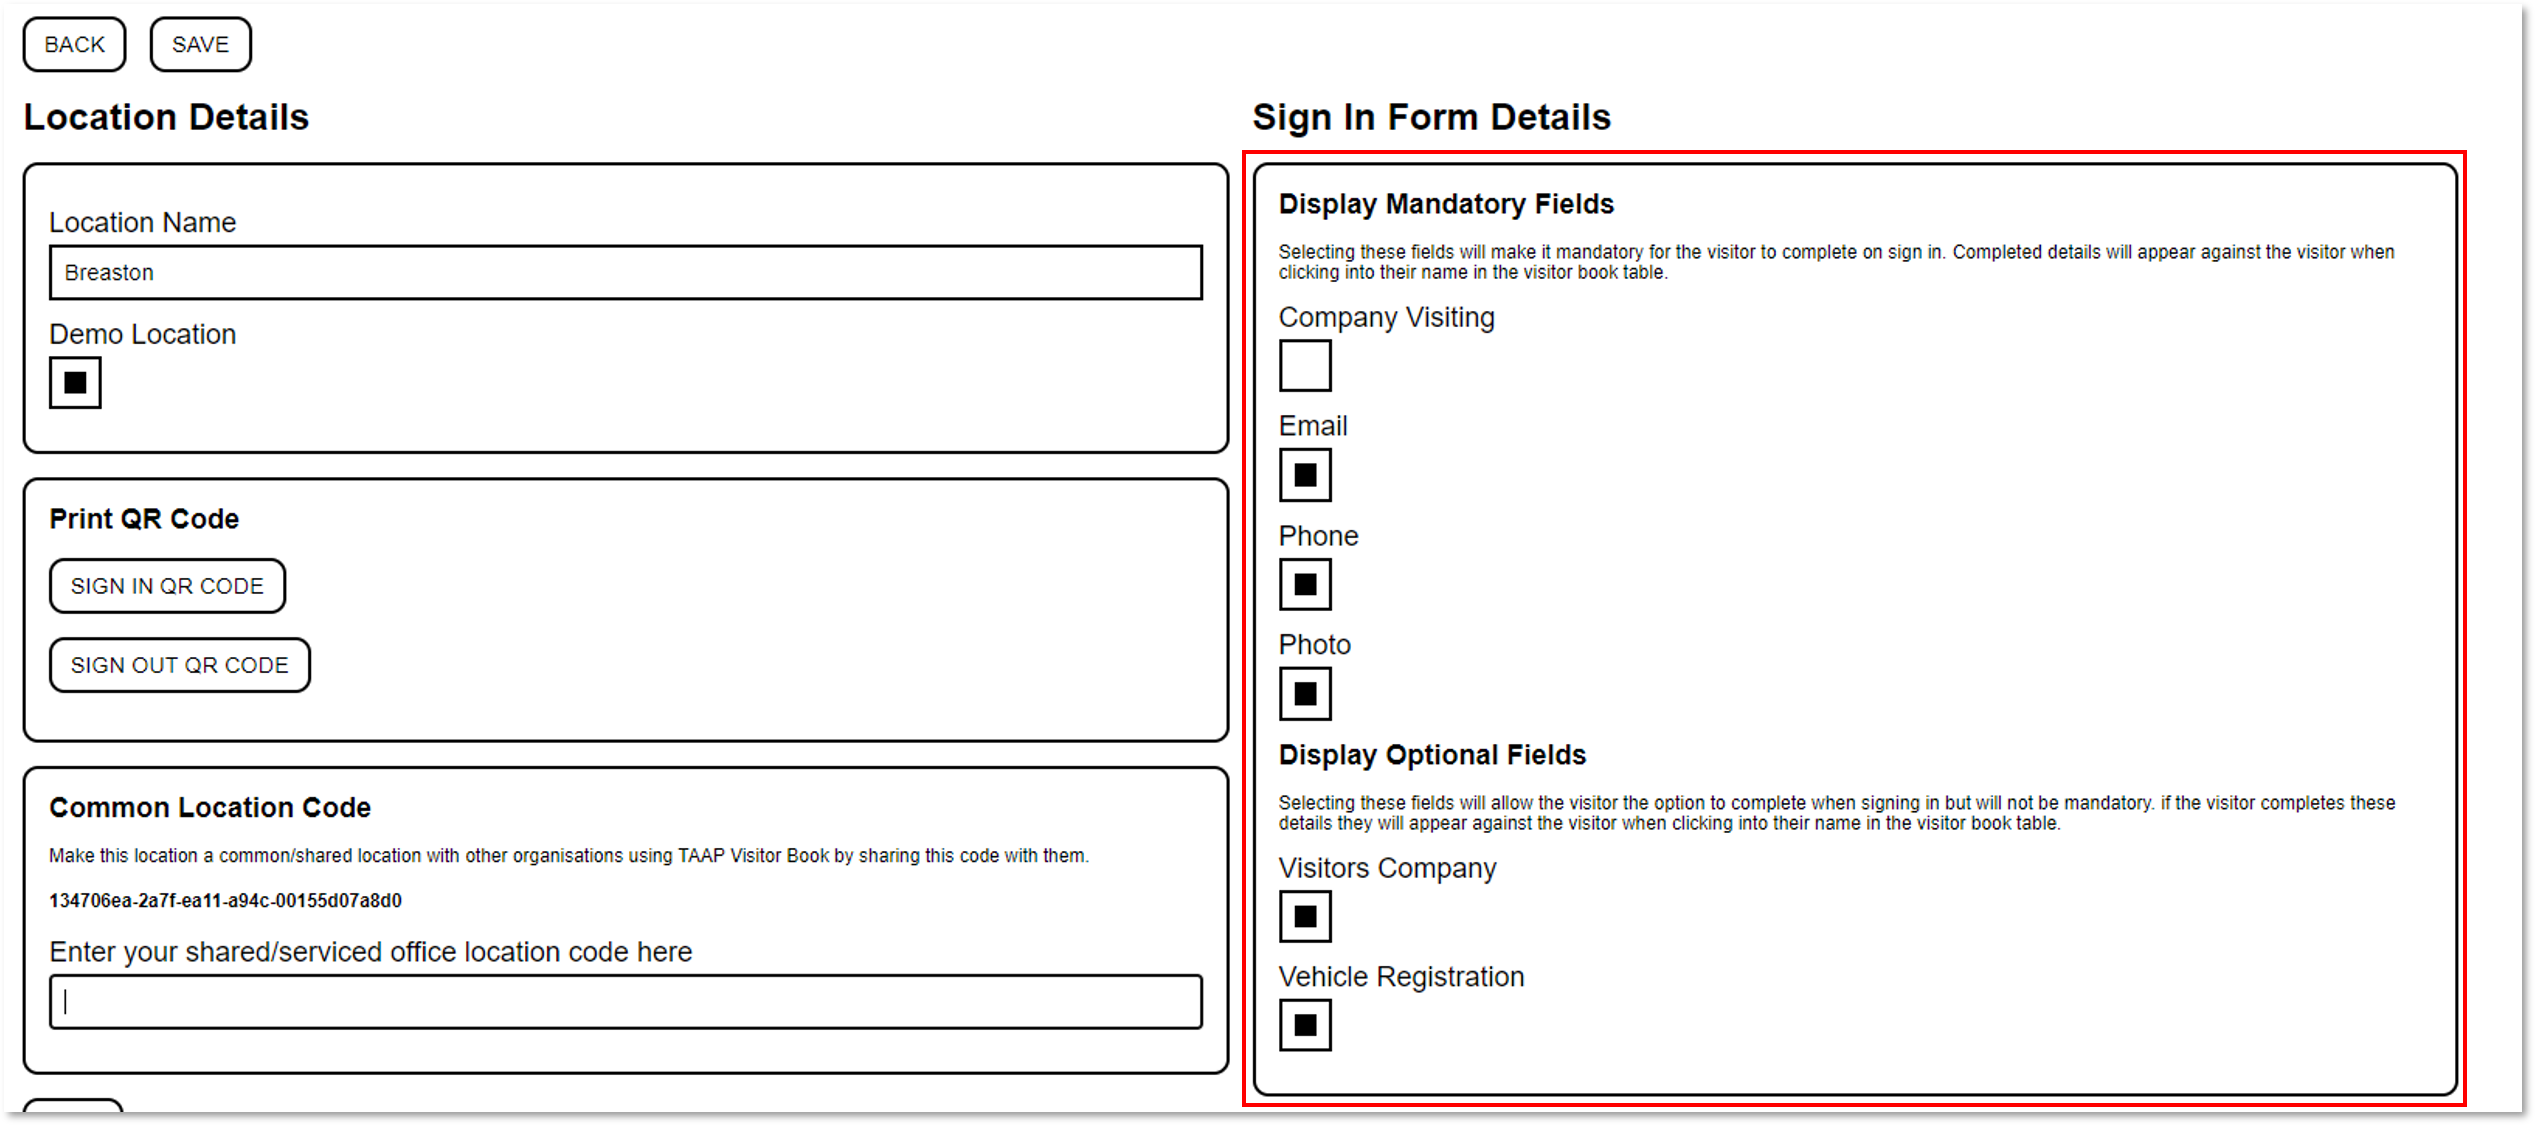
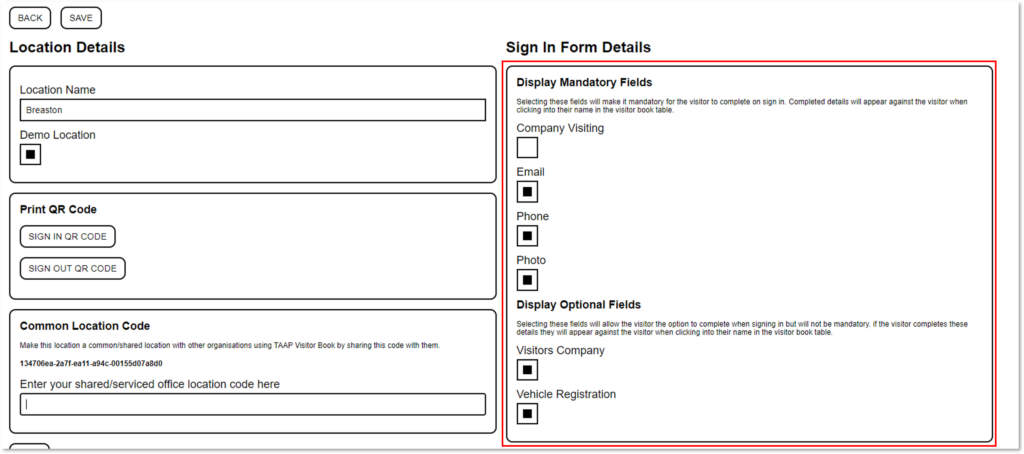
How do I manage the optional and mandatory fields that the Visitors must complete on sign in?
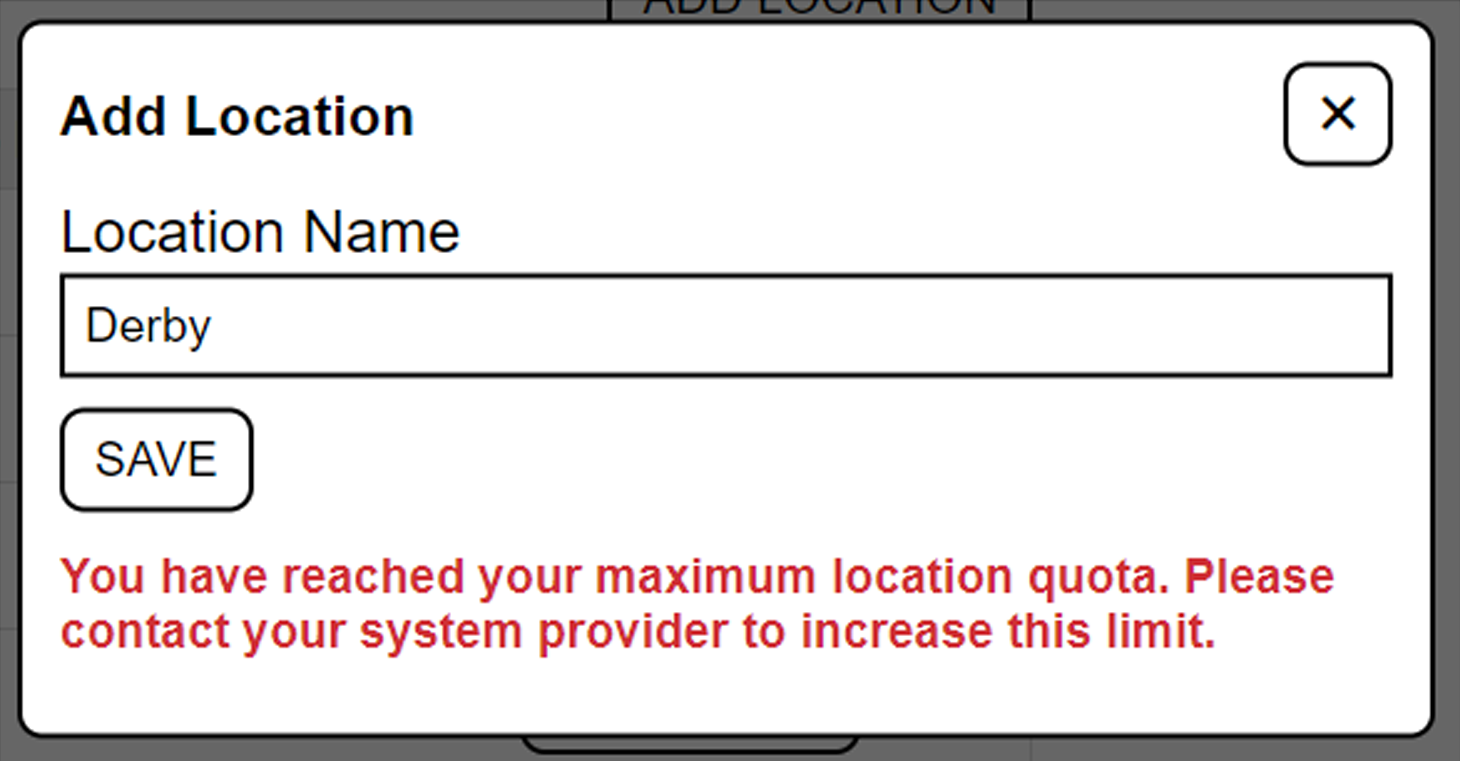
Why can’t I add another Location?
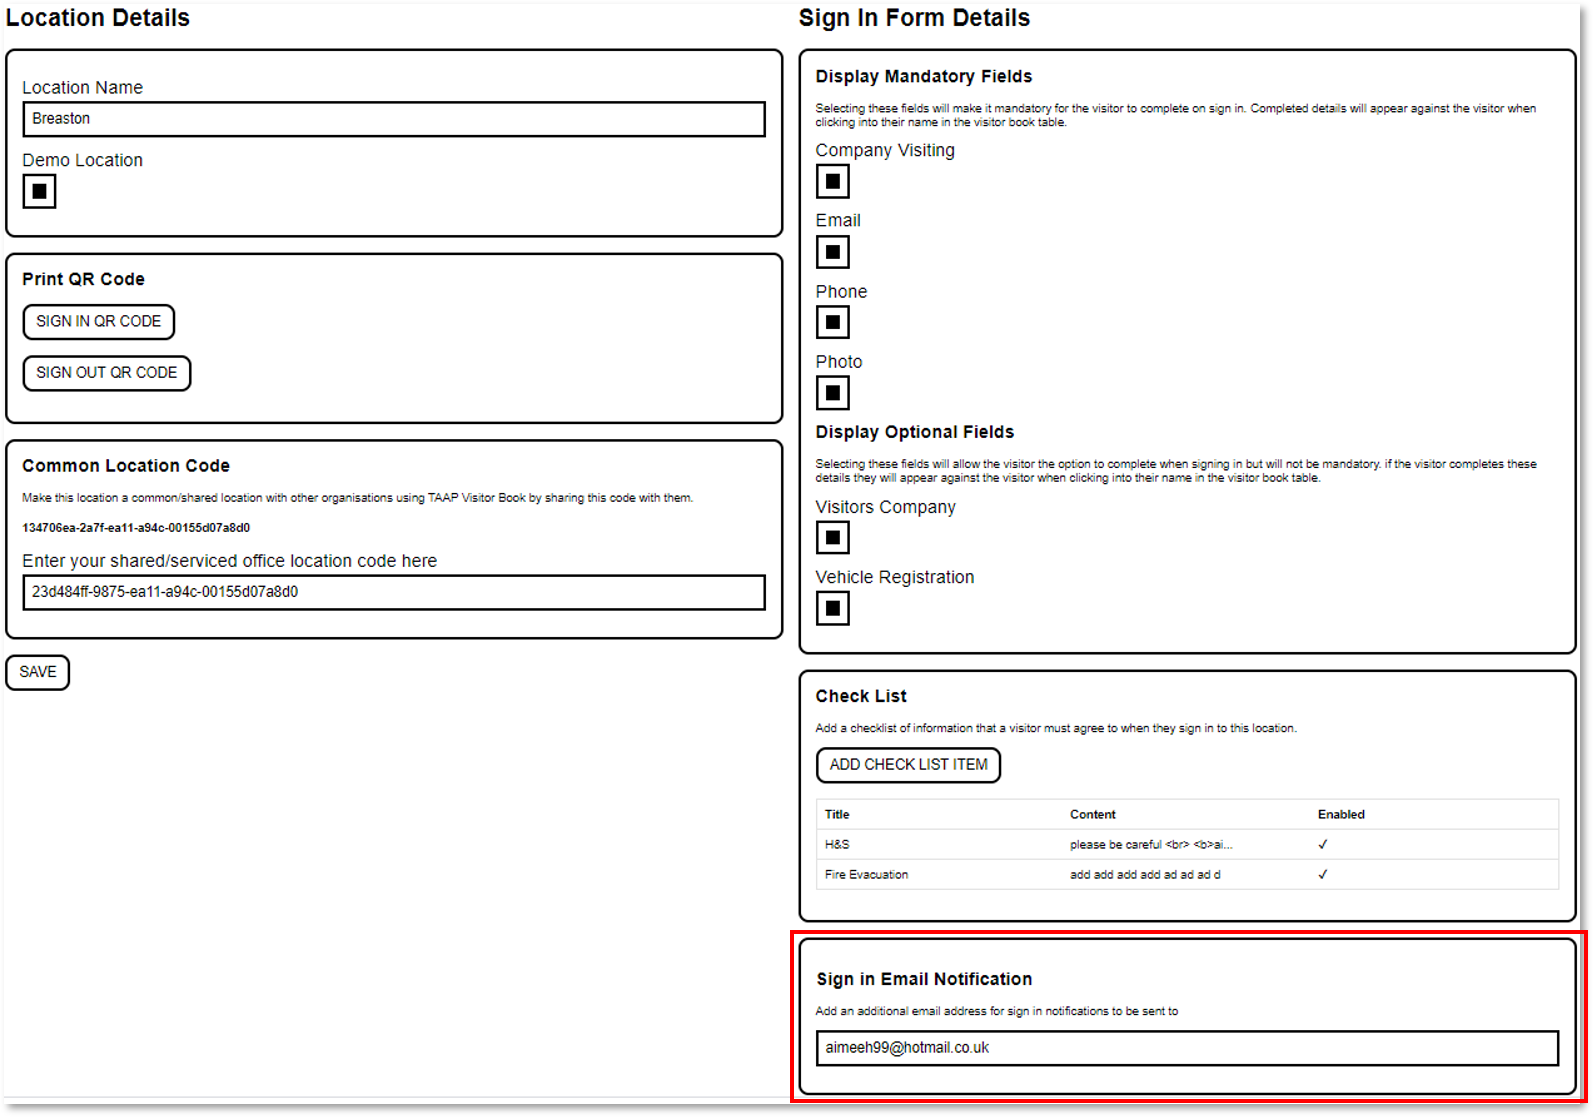
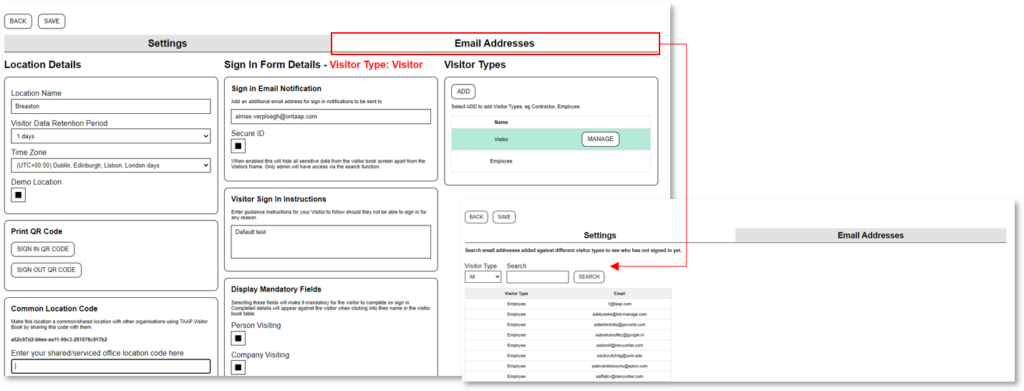
How do I setup an additional email address for Visitor sign in notifications to go to?
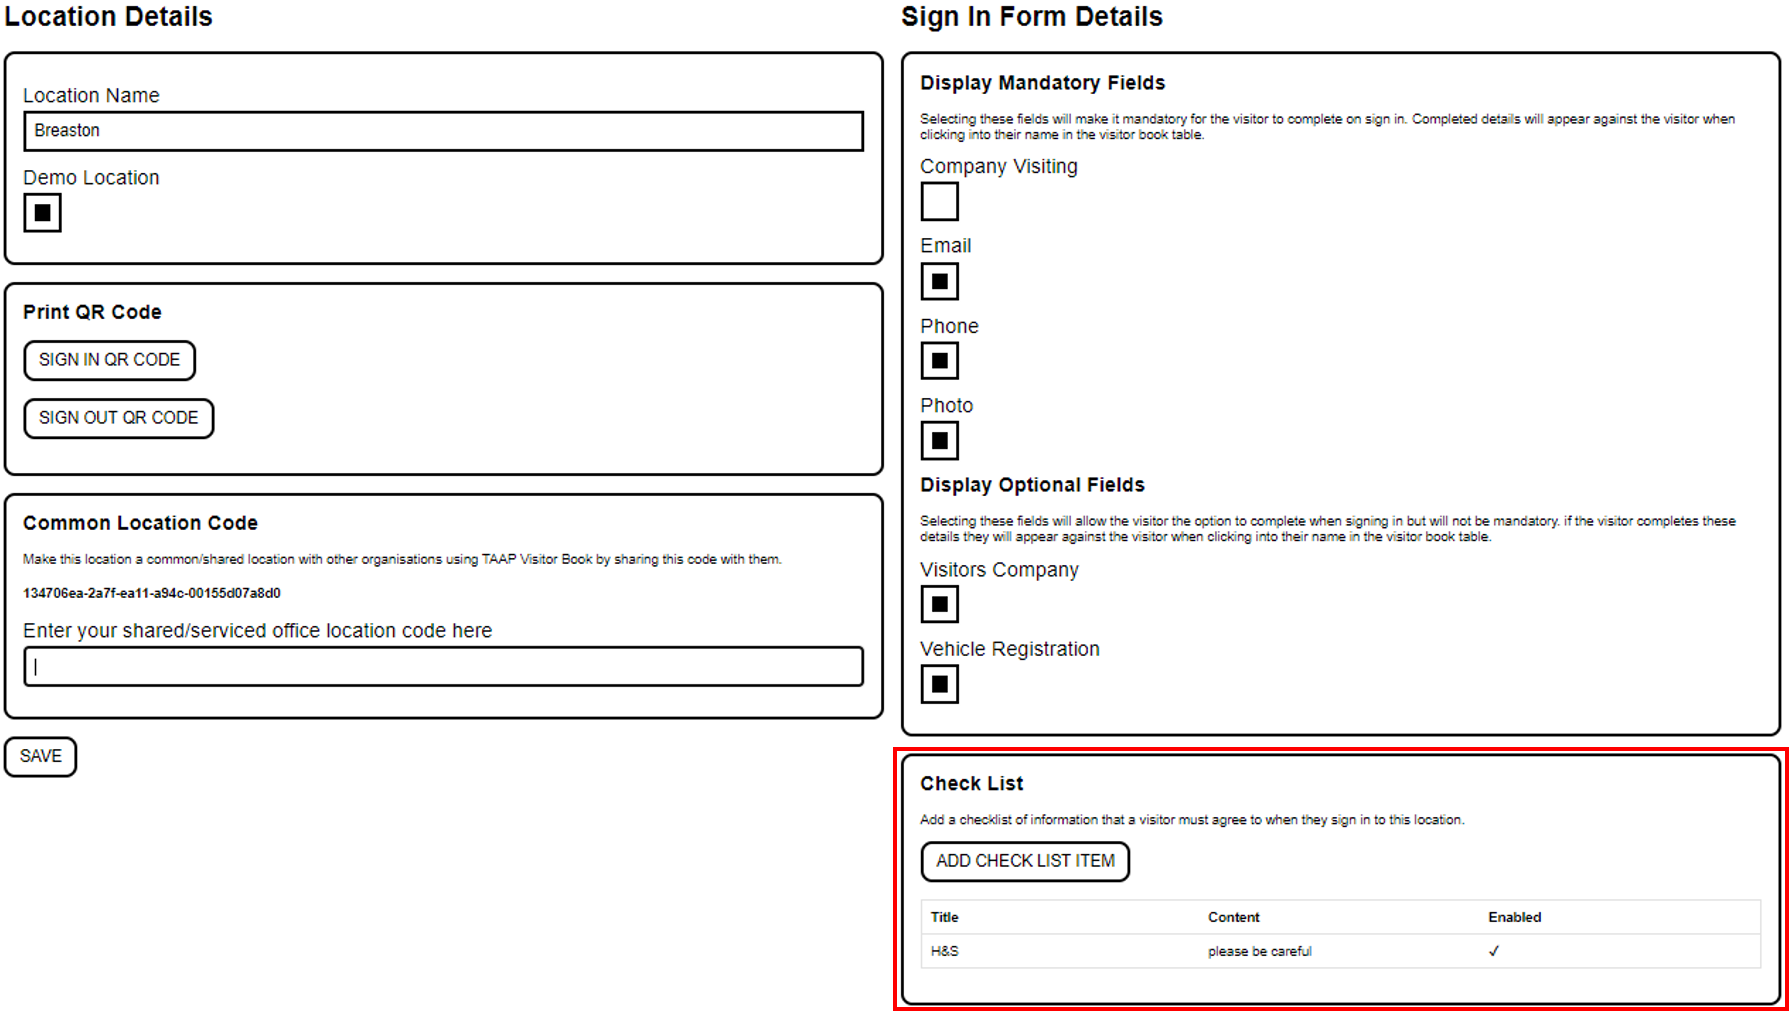
How do I manage checklists (e.g fire evacuation procedure, H&S notice) that my visitor must read and agree to on arrival?
How does the timer functionality work against a Check List item?
Can I add hyperlinks into a Checklist Item?
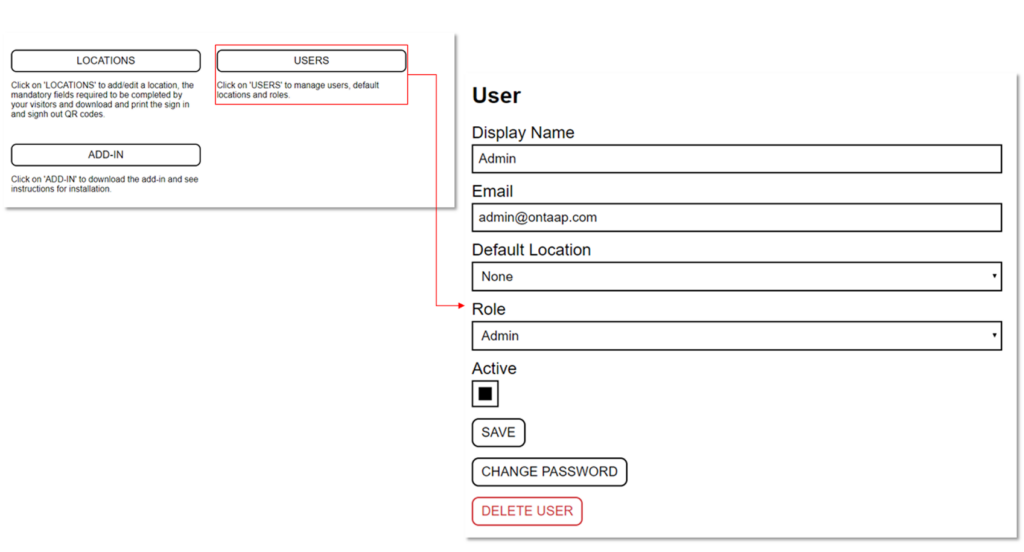
How do I add and manage users of the Visitor Book Portal?
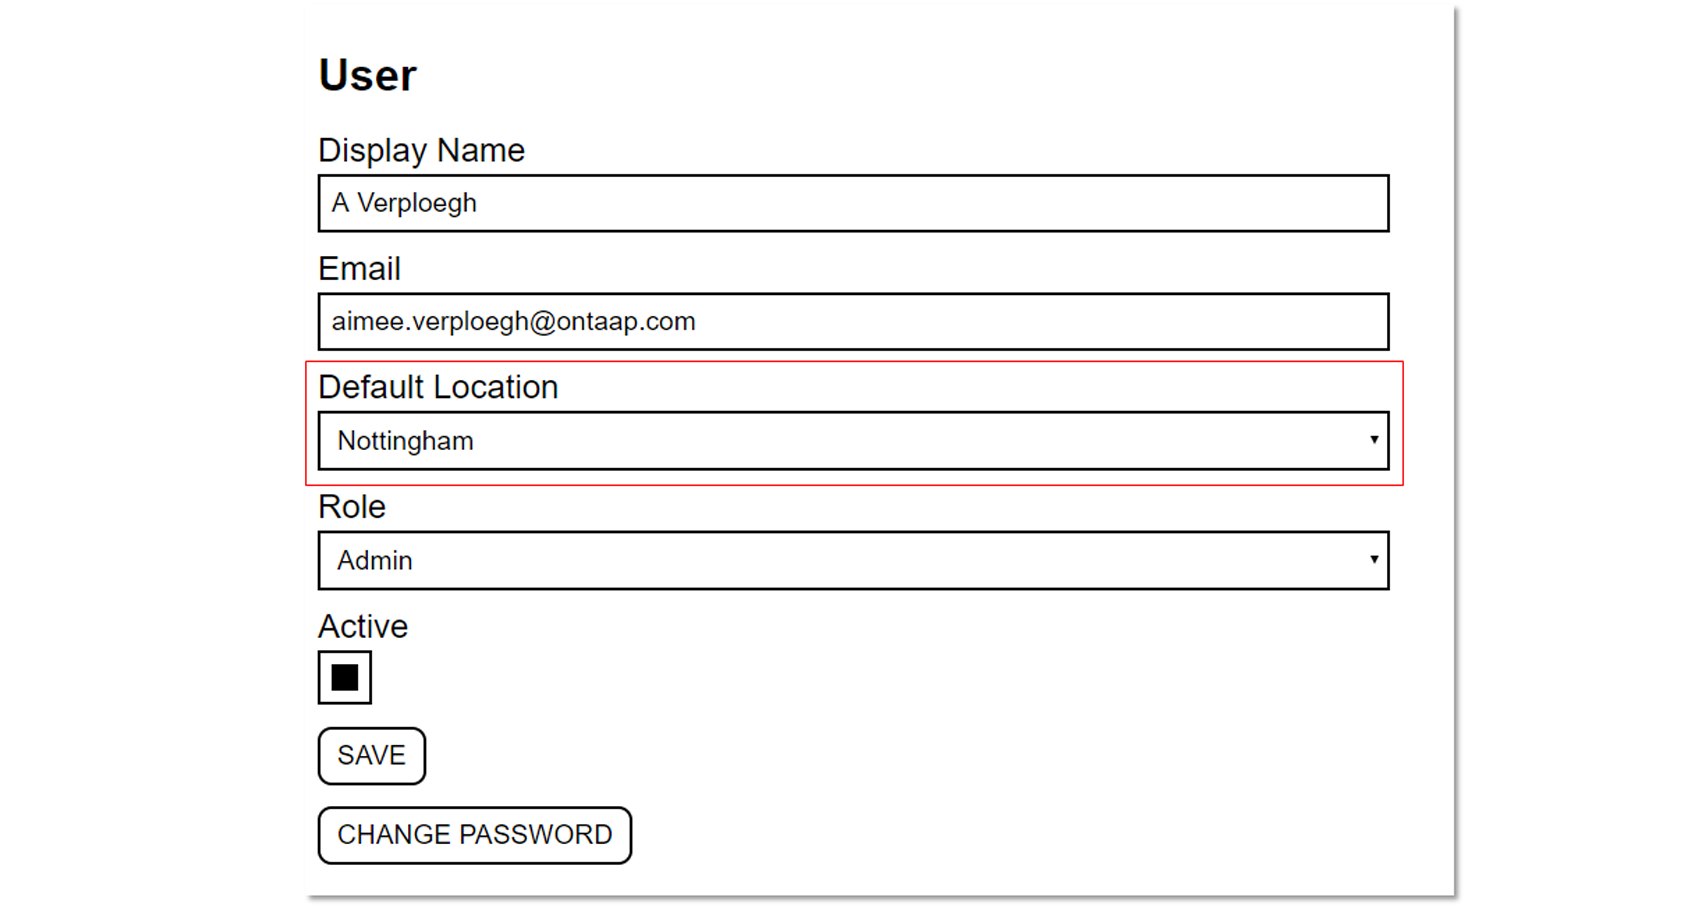
How do I link a Location to a user so they only see what they need to?
Why can’t I see other Locations in the Visitor Book?
How do I manage the optional and mandatory fields that the Visitors must complete on sign in?
How do I find the sign in and sign out QR codes for display at my Location?
I had to phone and/or email the host manually. Can this be recorded?
Why didn’t I get an email notification that my Visitor has arrived?
How does my Visitor sign in?
How does my Visitor sign out?
How do my Visitors get a Visitor Badge?
My Visitor’s camera will not scan the QR code?
Why does the Visitor sign in time appear incorrect?
How to download the Visitor Book app?
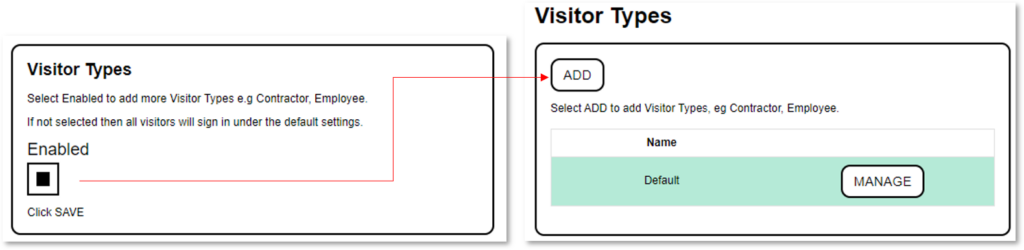
What are Visitor Types?
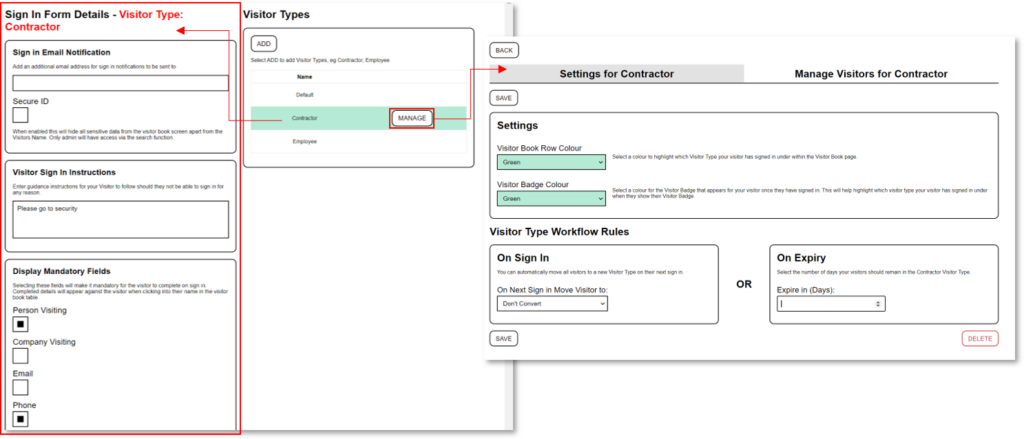
How do I setup Visitor Types?
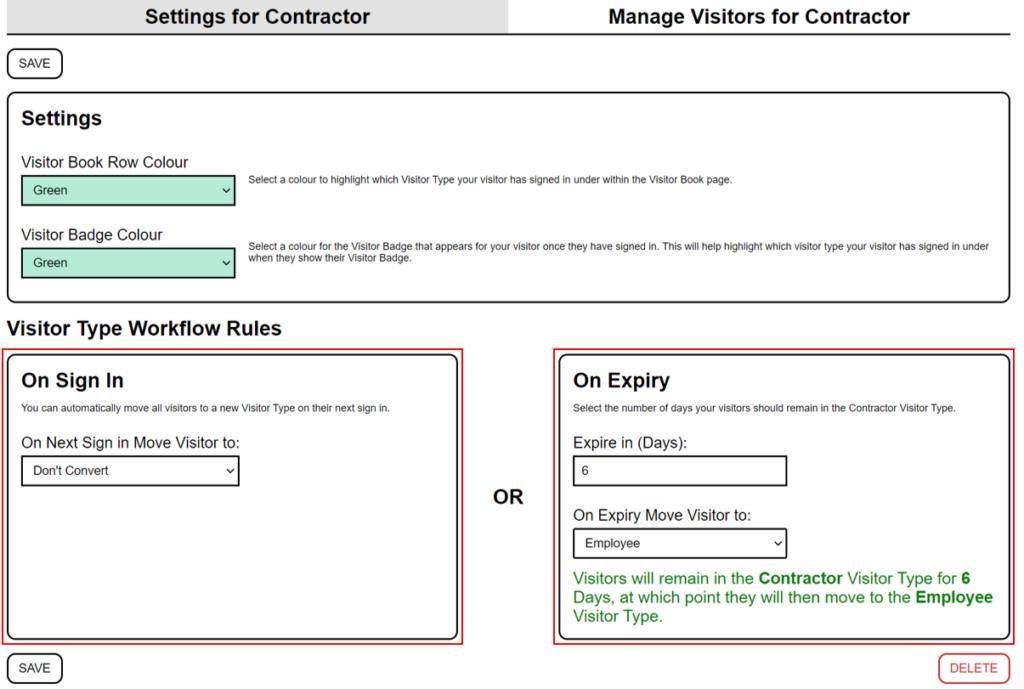
How do I manage Visitor Type settings?
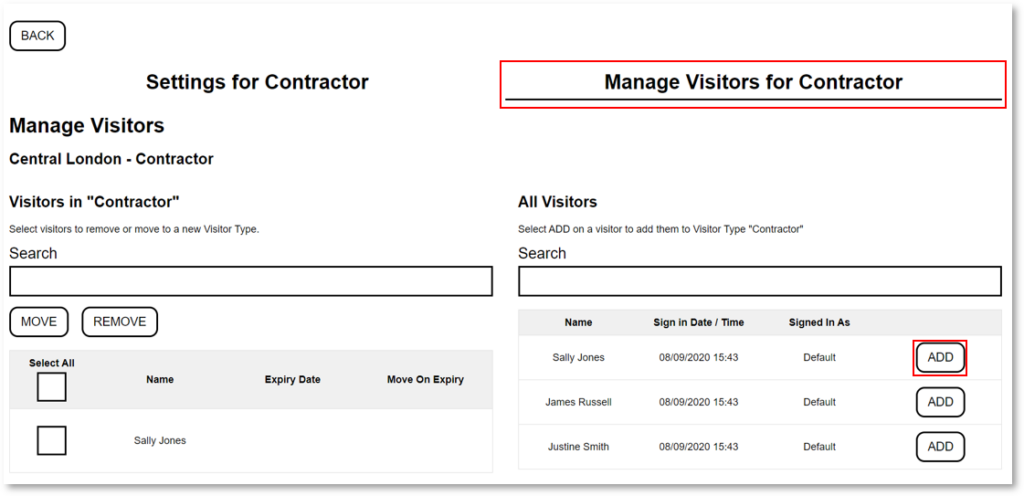
How do I manually move a Visitor to a new Visitor Type?
How do I remove a Visitor from a Visitor Type?

I am trying to map a Visitor to a Visitor Type, but the Visitor is not displaying in the list.
How can I create work flow rules to automatically move Visitors between Visitor Types?
How can I move people in bulk from one visitor type to another?
Why is my Visitor not moving to another Visitor Type?
Can I bulk load people into a Visitor Type?
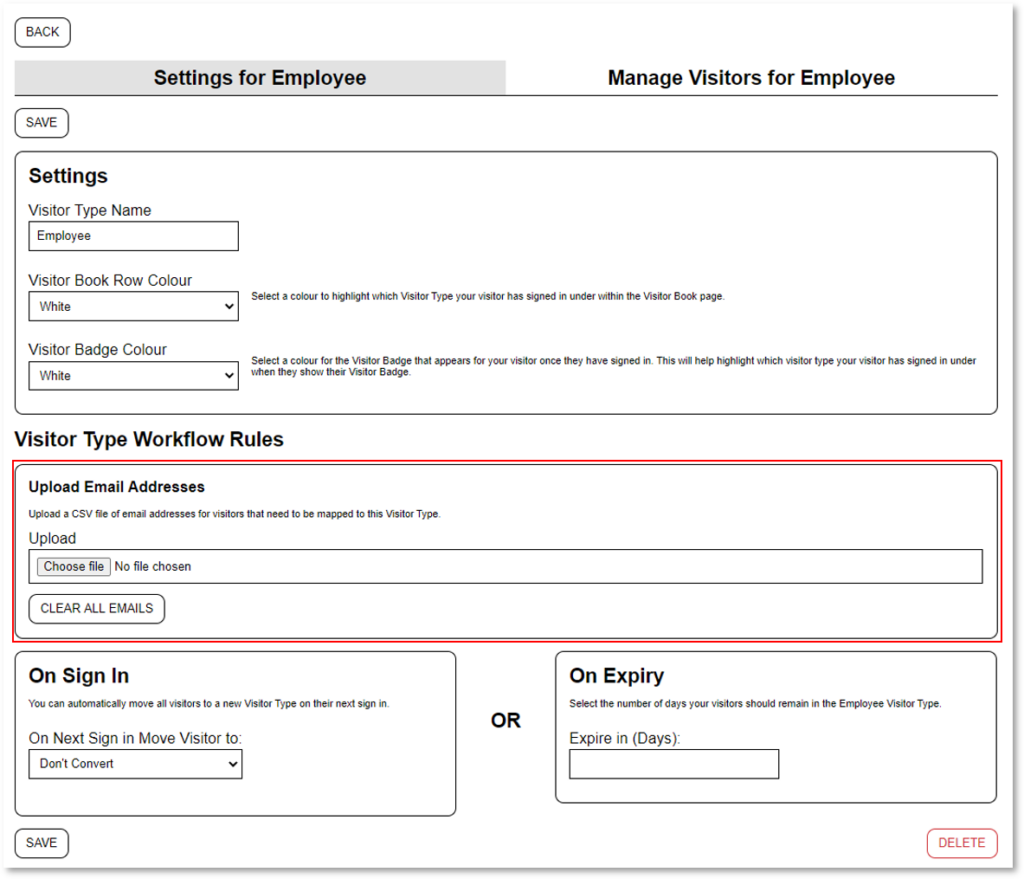
I have uploaded a list of email addresses against a Visitor Type but some people are not moving to the new Visitor Type.
I am unable to upload a list of email addresses against a Visitor Type
How can I see the email addresses loaded?
An email address is missing from the list
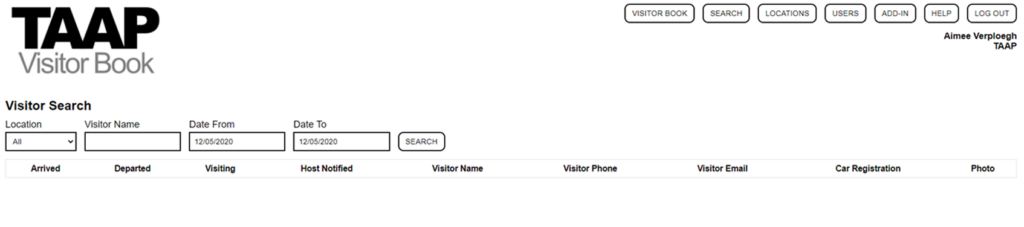
How do I search and export Visitor’s data?
How do I delete a Visitor if they request to be removed?
How do I view additional data captured against a Visitor?
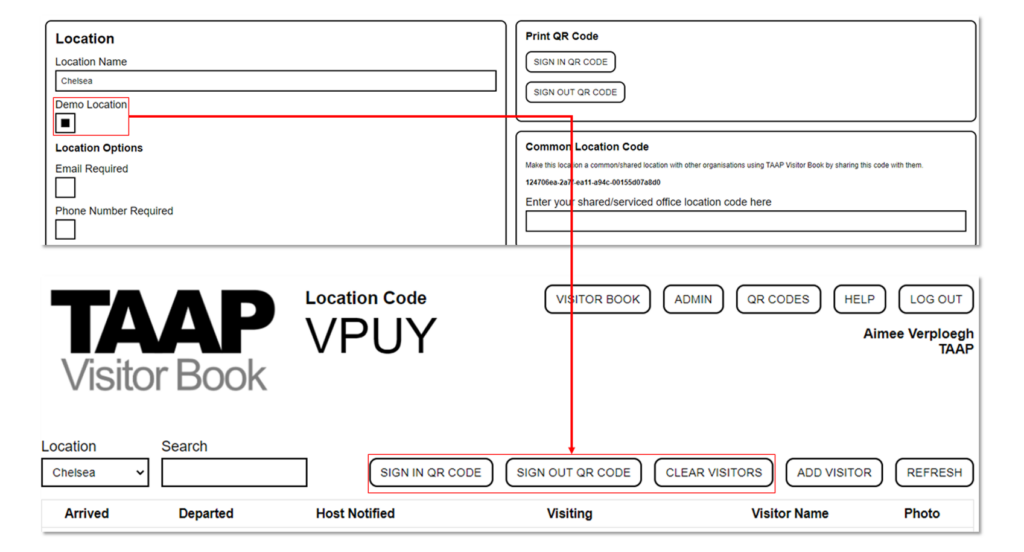
How do I setup a Demo Location for training purposes?
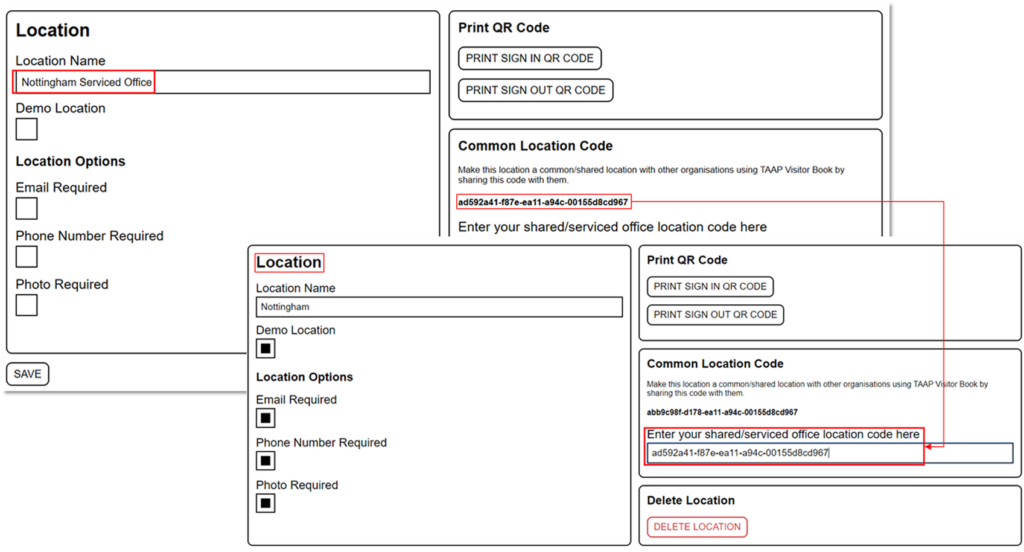
How do I setup the Common Location Code?